Georgina Hayden

Feeding since 1982

  • Recipes
    • Breakfast & brunch
    • Starters & sides
    • Light meals
    • Main meals
    • Snacks
    • Baking & puddings
    • Drinks
    • Preserving
    • Travel
    • Reviews
  • Books
    • MEDesque
    • Greekish
    • Nistisima
    • Taverna
    • Stirring Slowly
  • Styling
  • About
  • Contact
  • Press

Baking yourself ‘better’

09.15.2014 by georgie // 6 Comments

4 layer ombre cake
4 layer ombre cake

Like a lot of people I have always loved baking. Making ‘cartoon’ cakes as kids, fairy cakes with wings and glace cherries, cornflake cakes…  (although the time I tried to make them on my own aged 7 and almost set the kitchen on fire is another story). But I’m not a huge lover of the eating part. Not so much a ‘health’ thing (give me a cheese plate and I’ll demolish the lot in about 10 seconds flat), just that I’m more of a starter/ mains kinda girl. However I do love making them, like really love making them.

The idea of ‘baking yourself better’ came about after a friend mentioned that Mary Berry had said this after losing her son William. Of course I am sure it wasn’t just baking that enabled Mrs Berry to come to terms with her sons death, likewise I don’t think a million cakes will mean I ever stop thinking about Archie, or that I am ‘ok’ with what has happened but I totally see what she means. And after a little delve into the world wide web, it seems like we’re not the only ones. There are hospitals that are looking into ‘cooking therapy’, a charity called ‘The Depressed Cake Shop’ who run pop-up cake stalls selling only grey cakes to raise mental health awareness and lots more baking-mental health related features and facts. The famous novelist Marian Keyes also credits baking to getting her through tougher times. In her book ‘Saved by Cakes’ she writes: “Baking hasn’t cured me. But it gets me through … To be perfectly blunt about it, my choice sometimes is: I can kill myself or I can make a dozen cupcakes. Right, so I’ll do the cupcakes and I can kill myself tomorrow.” 

Ok so I am not depressed but I am grieving, and even though there is a difference, it is still dark. In the early, bleak days you were lucky if I showered. Now? I bake cakes. Nothing new you’re thinking, you’ve just told us how you have always loved to bake! But it is different now, it is appealing to me on another level. I take such time and pleasure in the calmness of baking, the methodical process, the concentration (you can’t rush these things); it is now an hour or two (or more) of brain respite. Some people love yoga, meditation, but I don’t. I just can’t switch off my mind for 90 minutes (surely more reason to stick with it but hey ho…), especially not now when everyday, every hour feels like an emotional roller coaster. Give me a cake to make however and I am there. In the zone and focused, and there is a little peace.

Last week was a ‘quiet’ week (not too many visitors, appointments, etc etc) and Pete had mentioned a long standing colleague of his was leaving. Before I knew it I was offering to make her a cake. Knowing this lady has a real penchant for all things pink, meant I was able to go all out and make a 4 layer pink ombre cake with some pretty OTT finishes – a style I’d been wanting to play around with for a while (inspired by the incredible Aussie baker Katherine Sabbath). And it helped, it was a project to focus on, and I came away feeling like I had achieved something – something I haven’t felt for a while. And best of all she loved it.

Sliced ombre cake


4-layer Vanilla Ombre Cake

Serves… a lot! Around 16-20

  • 350g unsalted butter, at room temperature
  • 350g caster sugar
  • 6 large free range eggs
  • 350g self raising flour, sifted
  • a tablespoon of good quality vanilla extract
  • a splash of milk
  • pink and red gel food colouring (not the liquid ones you get in the supermarket, they won’t be concentrated enough

Preheat your oven to 170/ gas mark 3. Grease and line the bottom of 2 x 9″ round springform cake tins.

In a freestanding mixer, or by hand, cream together the butter and caster sugar until very pale and light. One by one beat in the eggs, and with the last egg fold in a little of the flour.  Using a large metal spoon fold in the flour gently, taking care not to over mix as you’ll beat in the food dye and don’t want a tough sponge. Mix in the vanilla and a splash of milk if your batter is thick.

Divide your cake mix into 4 bowls – you can weigh the mixture to ensure it is even and precise if you like or do it by eye. I find it easier to start with the palest colour, so in this case using just a little of the pink food dye and beat it in to get your palest sponge. Then, with the next batch do the same but add a little more to get a stronger shade of pink. For the third sponge I incorporated a little red food dye with the pink to get a darker shade still, and by the 4th mixture I used half red and half pink. Mix the dyes into the batters so that it is completely mixed in and there are no streaks. Bake two of them in the prepared tins for around 18 – 20 minutes or until cooked through and only a little golden. (I always check my cakes with a skewer). Leave the sponges to cool in the tins for 5 minutes before transferring to a cooling rack. Careful clean the tins, as they will still be warm, then dry and re-grease and line. Cook the last 2 sponges, following the same process.

When all the cakes are completely cool, wrap them in cling film and refrigerate for a couple of hours. It will be easier to decorate them if they are chilled.

Dying the cake batter


Vanilla buttercream

Makes enough to fill, crumb coat and frost the cake

  • 400g unsalted butter, at room temperature
  • 800g icing sugar
  • Splash of milk
  • Vanilla bean paste

Beat the butter in a freestanding mixer until very pale and fluffy. Turn off your machine, add half of the icing sugar and gradually beat in, starting on slow and gradually getting faster. After a minutes, turn off the machine and repeat with the remaining icing sugar. Beat until you have a pale, almost white buttercream. Add a splash of milk and the vanilla bean paste and beat in.


Assembling…

Start by securing your darkest sponge layer to your chosen board. Just spoon on a little buttercream, spread out a little (not too much or it won’t stick properly) and ‘stick’ your base sponge to the board. Sandwich the remaining sponges in colour order (dark to light), with a buttercream layer. I place a spoonful in the middle of the sponge and using a spatula work the buttercream towards the edge of the cake. Once your sponges are all in place, use minimal amount of buttercream to ‘crumb coat’ the cake. Essentially you just need to apply enough buttercream to collect any stray crumbs off of the cakes, so that when you go on to decorate it, it looks perfect.

Crumb coating the 4-layers

Place the cake in the fridge for at least 30 – 45 minutes to set the buttercream, before decorating it with your final layer of buttercream. Starting with a generous amount on the top, moving in circular motions until you have a perfect smooth finish. (You can use a cake turntable if you have one!) Then do the same with the sides. Pop back in the fridge, ready for finishing.


Chocolate glaze

With my cake I made a chocolate glaze which I gently poured over and dripped down the sides. To make this I used:

  • 200g dark chocolate, broken into pieces
  • 75g butter, chopped into chunks
  • a tablespoon of groundnut oil

Place all the ingredients in a heatproof bowl. Pop over a pan of barely simmering water, be careful that the bowl doesn’t touch the water. Stir occasionally until all melted and mixed together, then remove from the pan and leave to cool for 10 – 15 minutes. You don’t want the chocolate to set but you also don’t want to melt the buttercream! When it is ready gently pour onto the top of your chilled cake and using a palate knife ease it to the edges so that it gently runs down the side. Leave to one side to set for at least 30 minutes before finishing.

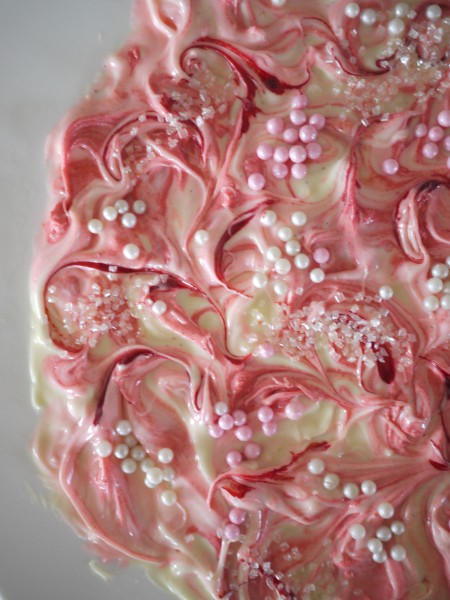
I finished my cake with a load of pink girlie goodies – roses and rose petals, little marshmallows and edible silver stars, little white and pink edible pearls and shards of a marbled white chocolate and pink bark I made specially. Oh and some edible glitter, of course.

Pouring over the chocolate glaze

Cake close up

White chocolate marble slab

Categories // Baking & puddings, Cake decorating, Celebration Tags // Baking, Cake

Easing into breakfast

09.10.2014 by georgie // 2 Comments

Ok, so I’d be lying if I said I didn’t start everyday with a coffee. I try and eat well, I don’t eat ready meals or fast food but I’m not a health food aficionado – I need caffeine and I need it within half an hour of waking up. And I’m not even a coffee snob; I adore good freshly ground coffee and living in east London there really is no shortage of amazing coffee roasters and cafes – see below for some of my favourites. However I’m Greek Cypriot and I also have a real love for instant coffee. Nescafé especially, as it reminds me of being a kid. (If you have ever been to Greece or Cyprus you’ll know how much the locals love a frappé).

So this morning was a Nescafé morning. The small caffetiere was dirty and being morning and me being lazy I hit the instant stuff. Heaven.

However anything other than coffee in the morning is a struggle. Weekend brunch is a winner, weekday mornings however just feels a little too early. And at the moment, where I am at home a lot of the day it’s quite easy to skip this all-important meal. I am trying to get into a routine though and this morning I wanted to go for a swim and knew I had to eat something first: cue the breakfast smoothie. I’ve really taken to smoothies over the last few months – it’s ‘something’ as opposed to eating nothing and is easy on the digestion for this breakfast-avoider. But most importantly, it’s the 5-a day thing. Actually consuming your 5 a day is hard work and takes dedication, so knowing I’m getting some nutrients feels like a bloomin’ good reason.

So for today’s breakfast I made a ‘raspberry milkshake’, which was incredibly delicious, nutritious and way better than a crusha down the Wimpy.

And the best tip of all? Chop up any ripe fruit you have lying around and freeze in sandwich bags, always ready for a smoothie attack. Reduces waste and makes smoothies lovely and thick – especially bananas, which give you a gorgeous creamy texture.

Here are a few of my favourites. All recipes serve 1. And if you haven’t got frozen bananas, use fresh and add a couple of ice cubes to chill.


Raspberry Milkshake

  •  A small chopped and frozen banana
  • Handful of raspberries
  • 8 grapes (or just use a few more raspberries)
  • Large spoonful of organic black cherry yoghurt (also be delicious with Coyo – dairy free coconut yoghurt)
  • Freshly pressed apple juice

Place all the ingredients into a blender with about 250ml of apple juice. Blitz until you have a smooth and creamy smoothie, adding a little more apple juice till you have your desired consistency.

Raspberry Milkshake


Breakfast on the run

  • Heaped tablespoon of rolled oats
  • 1 medjool date, stone removed
  • A couple of good pinches of ground cinnamon
  • A small chopped and frozen banana
  • a teaspoon of chia seeds
  • Full fat cows milk or almond milk (or any milk of your choice – hazelnut, soya, rice etc)
  • A drizzle of honey (I only use honey if I am using cows milk, as the others tend to have a sweetness to them already)

Place all the ingredients into a blender with around 250ml of your preferred milk and leave to sit for 3-4 minutes, to give the chia seeds time to swell up and do their thing. Blitz until you have a smooth creamy texture, adding a little more milk if you think it’s a bit thick.


The Popeye

This is based on a favourite of ours where I work, the kermit juice, an absolute winner of a breakfast smoothie. The twist being a squeeze of lime and milled flaxseeds, for optimum iron intake and a hit of omega 3.

  •  A small chopped and frozen banana
  • 1 small kiwi, peeled and chopped
  • Large handful of baby leaf spinach, washed
  • A squeeze of lime
  • Fresh apple juice
  • A tablespoon of milled flaxseed

Place all the ingredients in the blender with around 250ml of the apple juice. Blitz until super smooth, adding a little more juice if needed.


Coffee coffee…

So, if you’re ever in London town and want to hit some top coffee spots check out the links below for some of the best beans around.

Monmouth Coffee – Founded in ’78 Monmouth really has been around longer than a lot of these places put together. Expect to queue for what is exceptional coffee and totally worth it (it moves quickly). One of my favourite things? Curling up with a coffee in the Borough Market branch and digging in to the bread, butter and jam in the middle of the large table. All from the market and around £3 for as much as you can eat.

Climpson & Sons – a pioneer in the East London coffee roasting trend, Climpson’s has been around for 9 years and is still one of my favourite brews around. Their Broadway market no-nonsense cafe is always worth a visit, and great value for money.

OZONE – Old St based coffee roasters, this place does an exceptional flat white and some of the best brunch in town. The kedgeree is out of this world.

Caravan Exmouth Market and Caravan Kings Cross – Small batch coffee roasters, the blends are delicious along with superb food. Personal fave is the ham hock hash with poached eggs and mustard hollandaise. Be prepared to queue for a long time on the weekends though.

Allpress – Based in the heart of hipster central, Shoreditch based Allpress do great coffee and simple but delicious food. A perfect mid-shop caffeine hit.

TAP – I have a real soft spot for Tap, their laid back approach and delicious coffee make this an approachable contender. You don’t need to queue for hours or eat anything, you can sit and read and just drink delicious coffee. I spent many hours in there before or after the numerous hospital appointments we have had over the last year. And the staff are always nice.

Workshop – One of the largest of the coffee shops, Workshop Clerkenwell do great coffee and good food. Their corn fritters with halloumi, poached eggs and chutney are dreamy. The other branches have great reviews too.

Flat white at Ozone Coffee Roasters
Omelette with smoked haddock - Ozone Coffee Roasters
Omelette with smoked haddock – Ozone Coffee Roasters

Categories // Breakfast & brunch, Drinks Tags // Breakfast, Coffee, Dairy-free, Drinks, Gluten-free, Smoothies, Vegan, Wheat-free

Foods that heal

09.09.2014 by georgie // 3 Comments

A few weeks after losing Archie (our little boy),  my better half Peter returned back to work but would come home at lunchtime everyday to see me. The first day he came back was the first day I stepped into the kitchen (we had survived on foods from incredibly generous family and friends up until this point). We ate scrambled eggs and avocado on toast. Or that was the plan at least, in actual fact we pretty much just ate avocado and blackened bread. I’d ruined the scrambled eggs, charred the toast. How can you ruin scrambled eggs when you cook for a living? Who knows, but I did and it led to a melt down. What was I going to do with my life? I can’t even scramble eggs! It was not pretty.

It has been a bleak few months and for the first time in my life food and eating have been pretty low down on my priority list. I didn’t think I’d ever actually know what it felt like to eat for energy and not for fun, but that is what it has been like – food to fill a hole. But then little by little my love of cooking is creeping back in. Our large groaning bookshelf  is serving a purpose – how many cookbooks does one girl need? It is rebuilding my confidence, rebuilding my body -which has taken a battering, and is helping me fall back in love with cooking and eating.

Being someone who writes recipes for a living I’ve never been particularly good at following recipes from books, often I would read them as inspiration and tweak things here and there depending on what I have and what is in season. However I genuinely feel like this mammoth book collection has been a saving grace – I haven’t felt able to ‘go it alone’ and being hand held is exactly what I need right now. My weekly goal is to find things to cook during the week, make a list and shop. Simple but it is proving to be a huge help. I love going to the butchers, fishmongers, green grocers and even supermarket – things I took for granted before. There is something wonderful about being frugal too. My aim is to make use of everything we have, trying to keep waste to a minimum. It’s a wonderful exercise.

So what do I mean by foods that heal then? There are the foods that are nutritionally sound, such as the bombay eggs and spinach I had for lunch today (spinach, turmeric, green chilli, garlic, cumin, free range eggs… winner on so many levels), which I know are healing me on the inside and then there are the recipes that are healing emotionally. There is definitely something calming almost meditative with certain recipes, especially things like baking and preserving which take time and patience. There have been many batches of bread over the last few months (a few inedible), and even Peter has become addicted to the no nonsense recipe we have adopted.

So for my first ‘healing’ recipe I give you a simple one. Jam. It was one of the first things we made, and we’re still enjoying the fruits (sorry) of our labour. Also, making apricot jam leads onto one of my favourite meals of all time… the most comforting thing you’ll ever eat. I’ll save that for next time though.


Apricot jam

  • 1kg apricots (when I made this years batch I also had a glut of flat peaches, so threw a few of those in there too)
  • 600g granulated sugar
  • Juice of 2 lemons
  • A bay leaf

Halve the apricots, keeping 6 of the stones to one side, and place the flesh in a large heavy bottomed saucepan. Add the sugar, lemon juice  and bay leaf and give everything a good stir. Leave to one side to steep for a couple of hours.

Using a nut cracker, or rolling pin (be careful though!) crack 6 of the apricot stones and remove the kernels. Place in a small bowl and cover with boiling water, for just enough time to remove the brown paper skin. Split each kernel into 2 and add to the pan of fruit.

After 2 hours place the pan on a low heat and stir until all the sugar has dissolved. Once it has dissolved turn the heat up to medium-high and cook for around 25 – 30 minutes, stirring often. You want the apricot flesh to have cooked down and should have a lovely deep colour – it’ll be a medium soft set jam.

When the jam is ready, leave it to cool for 10 minutes and then carefully spoon into sterilised jars (try and make sure you get at least one apricot kernel in each jar). Seal whilst still hot and then leave to cool before labelling them. Once you open a jar, remember to store it in the fridge.


Making apricot jam
Making apricot jam

Categories // Preserving Tags // Apricot, Dairy-free, Gluten-free, Jam, Preserving, Wheat-free

  • « Previous Page
  • 1
  • …
  • 24
  • 25
  • 26
Meet


Georgina is an award winning food writer, cook and presenter from North London.
Read more about Georgina

Recent Posts

  • New Book Release: MEDesque
  • Book Publication Week – Greekish is here!
  • Introducing “Family Feeds”: A Tasty New Podcast about Food and Family
  • Be More Yiayia T-Shirts are here!
  • Nistisima (And Hello!)

Copyright © 2026 · Modern Studio Pro Theme on Genesis Framework · WordPress · Log in